How to install ScriptX.Services for On-Premise Devices on Windows 10
ScriptX.Services for On-Premise Devices requires Internet Information Services (IIS) 7.5 or later on Microsoft Windows.
Internet Information Services is available as a feature on Windows 10 and can be used. Further, if a Windows 10 PC is available to which the main (and same account) is always logged in whenever printing services for nearby devices are required then installation is reasonably quick and easy.
This article shows a walk-through of installation on Windows 10. If you have a departmental server running Windows Server 2012 or later, then please see to install ScriptX.Services for On-Premise Devices.
In order to use ScriptX.Services for On-Premise Devices you will require a license. To evaluate ScriptX.Services for On-Premise Devices please order a license for your PC. The license will be valid for 60 days to enable you to fully evaluate the functionality.
To complete the license order you will need the name of the computer(s) on which you which you wish to install the ScriptX.Services for On-Premise Devices - this is the "Computer name" shown in Control Panel System Properties or "PC Name" shown in Settings | About.
Please visit ScriptX.Services Pricing and Licensing to order a license.
Configuration Overview
ScriptX.Services for On-premise Devices has two parts:
-
A web application hosted in IIS that provides the REST API to be called by clients to perform printing and provides a dashboard for configuration and testing of the service. The application is implemented with ASP.NET Framework v4.6.1.
-
The ScriptX Print Server - a COM based server (MeadCo ScriptX Broker/Host) that provides the pagination and printing service that is called by the REST API.
Each runs in its own process; and each can run under the default accounts - and the Interactive log-in.
This means someone must be logged into the machine whenever print services are required. We are not illustrating unattended operation.
We start from a clean PC with nothing installed, for example no IIS. You may already have compoments such as IIS and Web Deploy already installed and configured in which case review the requirements but otherwise skip ahead to installing ScriptX.Services for On-Premise Devices..
Install Internet Information Services
If Internet Information Services has not been installed yet, then install by turning the Feature On:
First find the features panel by typing "windows features" into the search box on the task bar
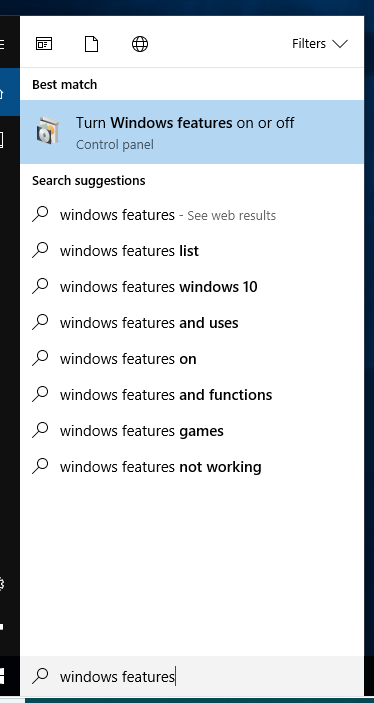
Select "Turn Windows Features On or Off"
In the Windows Features dialog, expand Internet Information Services and check the following features:
- Web Management Tools | IIS Management Console
-
World Wide Web Services
-
Application Development features
- ASP.NET 4.6 (or 4.7) - this will automatically check other required options
-
Common HTTP Features
- Static content
-
Security
- Basic Authentication
-
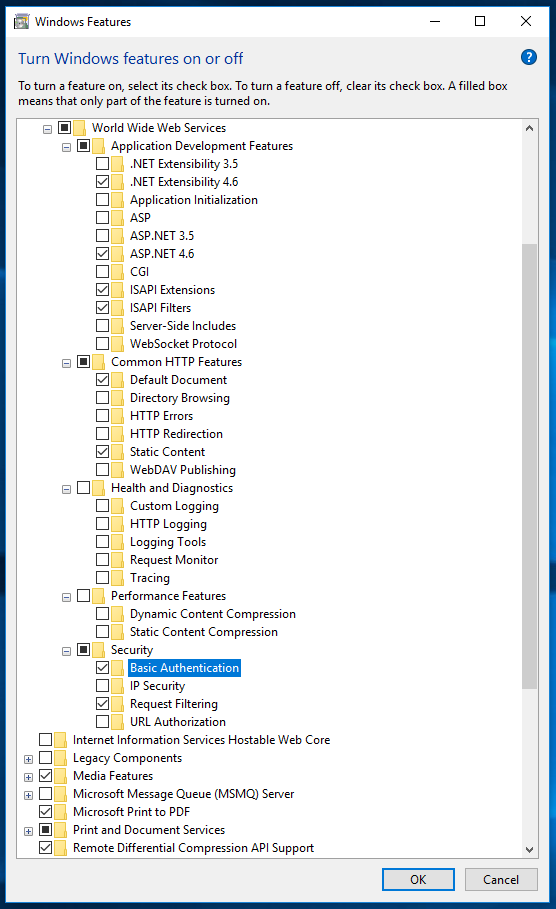
and finally click OK to turn the IIS Feature on.
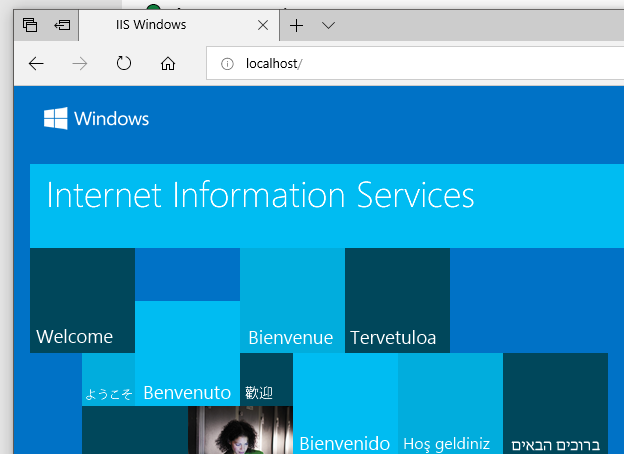
Now navigate to your server (e.g. http://localhost) to ensure that server is available and the default home page is returned:
Install Web Deploy
Using Web Deploy is a convenient way of installing the ScriptX.Services WebApp. More details on Web Deploy are available in this article.
If Web Deploy is not already installed, then we recommend using the Web Platform Installer to install it.
Install Web Platform Installer
- Download/run Web Platform Installer : https://www.microsoft.com/web/downloads/platform.aspx.
Install Web Deploy
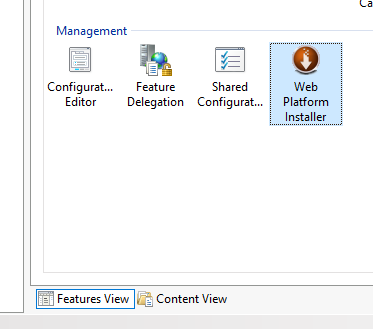
Web Platform Installer is available in Internet Information Services (IIS) Manager:
Internet Information Services (IIS) Manager is available on the start menu (it may be hiding in the Windows Admistrative Tools folder) and you may need to restart it after installing Web Platform Installer.
Run Web Platform Installer.
-
Search for Web Deploy.
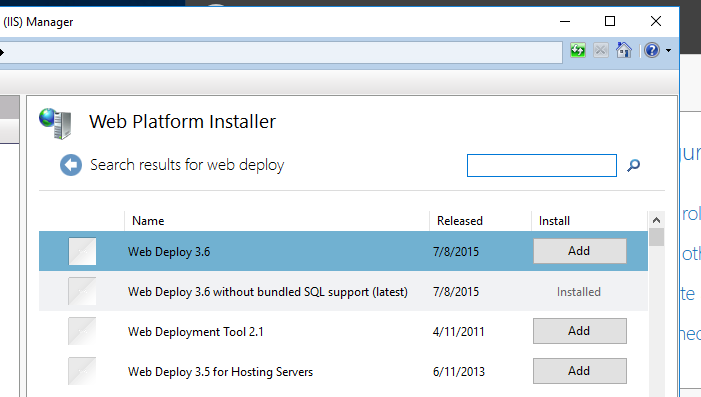
Install Web Deploy 3.6 without SQL.
Install and Configure ScriptX.Services for On-Premise Devices
The install of ScriptX.Services for On-Premise Devices requires installation of two applications/servers and configuration of the services.
Each of the components required for ScriptX.Services for On-Premise Devices is available from the showroom at MeadCo's Codestore.
Install ScriptX Server
ScriptX Server provides pagination and printing services for the Web Application.
Download ScriptX Server from ScriptX.Services for On-Premise Devices Resources
-
Run the downloaded installer.
Install and Configure ScriptX.Services for On-Premise Devices Web Application
The web application provides the REST API for clients and a dashboard for configuration and monitoring of services usage.
Create Application Pool in IIS
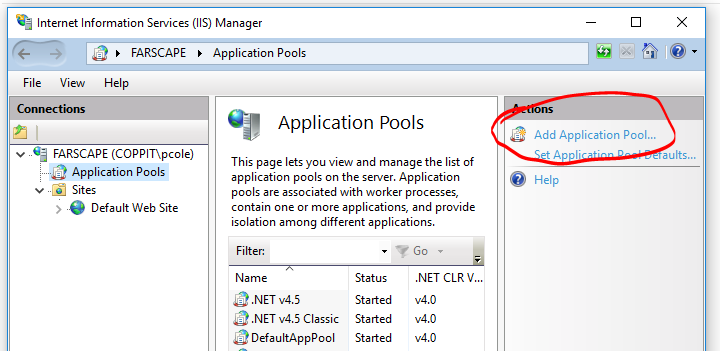
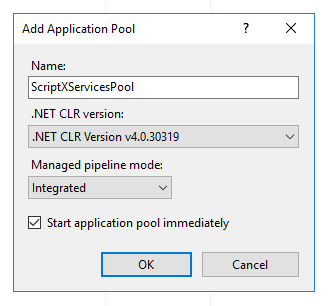
We recommend a new pool is created for the ScriptX.Services application named, for example, ScriptXServicesPool. The pool must use .NET CLR v4 in Integrated Pipeline mode:
After creating the pool, edit "Advanced Settings..." for the pool and ensure:
Enable 32bit applications is
False, andProcess model identity is changed from ApplicationPoolIdentity to Custom account and the account of the current user (who will always be logged in when printing is required), and
Load User Profile is
True
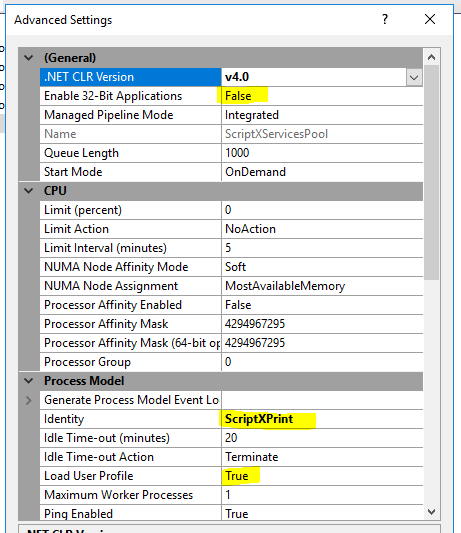
The account name "ScriptXPrint" is for illustration only - the name of the primary interactive account used on the machine (likely the account you are logged into) should appear for Process Model identity.
Install the Web Application
-
Download the IIS Web Application package for ScriptX.Services for On-Premise Devices from ScriptX.Services On-Premise Resources
-
The downloaded package is a .zip file and should be Unblocked (Use Properties in File Explorer) and then unpacked to a suitable folder on a hard drive (e.g. c:\ScriptX).
-
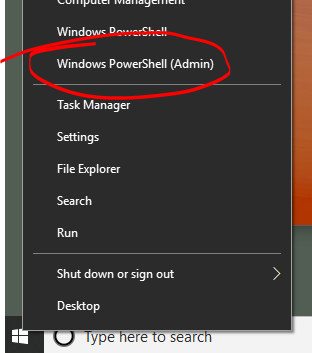
Open an admin Powershell prompt and cd to the folder created.
Install to an Application in the Default Web Site
This install will create an application named "ScriptXServices" (http://localhost/scriptxservices).
-
Use the command
.\OnPremserver.deploy /Y- the application will be created but will use the DefaultAppPool.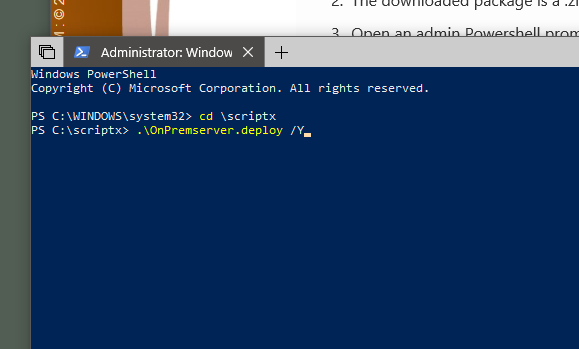
Note that an error will be reported:
                    Error: The account 'ScriptXPrint' does not appear to be valid. The account was obtained from this location: 'setAclAccess'.
                    Error: Some or all identity references could not be translated.
                    Error count: 1.
This error can safely be ignored.
-
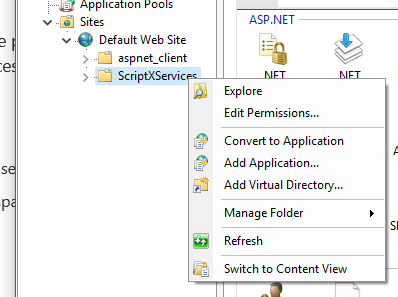
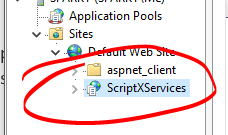
Navigate to Sites\Default Web Site\ScriptXServices (note that it is listed as a folder).
Right click on the site and choose Convert to Application
This step is required due to the error above, we will resolve this in a future version.
The Add Application Dialog will appear.
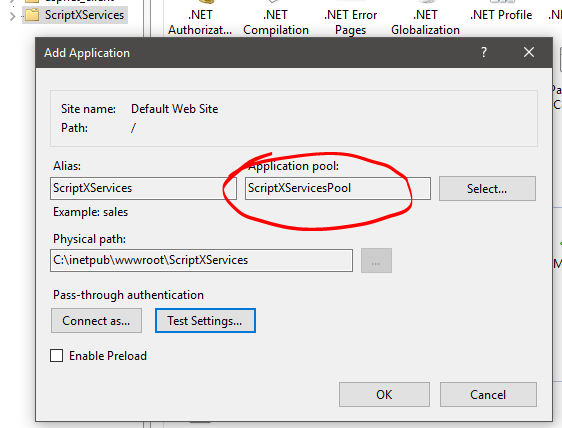
-
The pool will be DefaultAppPool. Use the Select... button to change it to the pool created earlier (ScriptXServicesPool).
-
Click OK on the Add Application dialog and the ScriptXServices folder will be converted to an application.
-
-
In the Powershell prompt, use the command
.\OnPremserver.deploy /Yagain. This will set the required permissions on the App_Data folder.
Note that the error will be reported again:
                    Error: The account 'ScriptXPrint' does not appear to be valid. The account was obtained from this location: 'setAclAccess'.
                    Error: Some or all identity references could not be translated.
                    Error count: 1.
This error can safely be ignored again.
Apply License, Configure and Test
The last step is to configure the server with your license.
The server must be able to connect to the Internet in order to download the license.
If connection is not possible then please contact us for details on installing the license manually.
Apply ScriptX.Services for On-Premise Devices License
In order to use ScriptX.Services On-Premise you will require a license. To evaluate ScriptX.Services for On-Premise Devices please order a license for your server. The license will be valid for 60 days to enable you to fully evaluate the functionality.
Please visit ScriptX.Services Pricing and Licensing to order a license.
After your order is processed you will be supplied with a License ID unqiue to you.
Navigate to the server with your browser (e.g. //localhost/scriptxservices). As the server is not yet configured, the server dashboard will start at the Configure server screen:
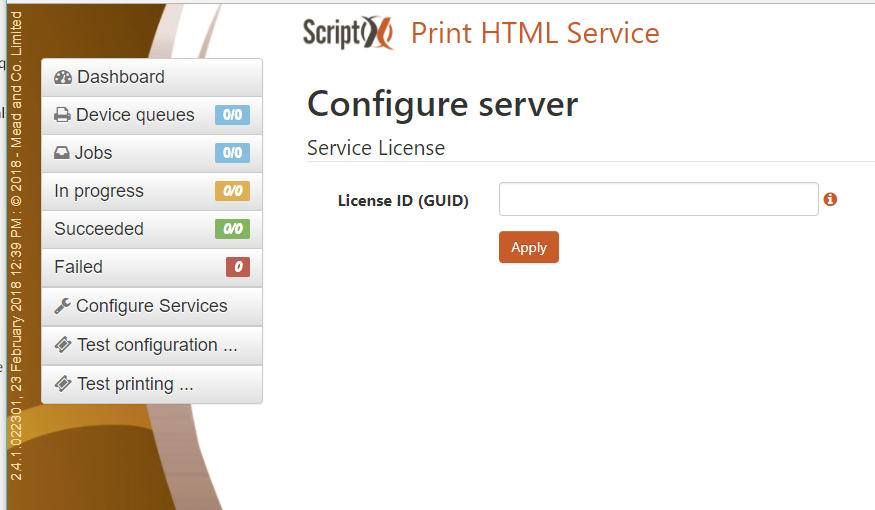
Enter your license ID and click Apply.
The license will then be downloaded, validated and applied to your server and the screen updated to show the details of the license and the printers that are available to the server.
Configure available printers
By default the only printer available from the ScriptX.Services for On-Premise Devices is the default printer of the configured Identity account for ScriptX Server (in this case the logged-on user).
Choose all the printers you wish to be available and then click Use these printers.
Test printing
After configuring the printers to be available, click `Print` this page to send a printable version of the page to the default printer.
If printing fails, trouble shoot by using the Test configuration and Test printing facilities. All licensees are entitled to full technical support.
Using the ScriptX.Services for On-Premise Devices server to print
How to use our samples with your own ScriptX.Services for On-Premise Devices server